Note before you begin -
For good response from VM, at least 8 GB RAM is recommended on your Laptop/Desktop.
You need to have ADMIN ACCESS on your windows laptop (or on MAC).
Make sure that you can login on your Windows LAptop/MAC before you proceed.
Building a Virtual Machine under Vmware Player and then migrating it to another Vmwaye Player/Vmware Fusion running under Windows laptop or Macintosh laptop.
Step # 1 – Logon to your laptop while on SLAC Network.
Step # 2 – Install Vmware Player on Windows machine.
Step # 3 - Build a VM using specially prepared boot.iso file for kickstarting.
Step # 4 – Ones the VM is built, install Vmware Tools on the Guest OS.
Step # 5 – Shutdown the VM. Power off the VM.
Step #6 – Copy the VM folder and move to another Windows PC or to MAC where you want to migrate it.
Step #7 – Start VM on another Laptop/MAC where you have copied/migrated it.
You can kickstart a VM either using a boot cd and then following a normal kickstart procedure or by preparing a custom boot.iso file and booting it from the iso file.
Following procedure uses custom iso file to kickstart/build the VM.
Create a custom boot.iso file on a linux server (for example on mcclogin) and copy it on Windows machine. This is a custom boot.iso file and has ks.cfg file under isolinux directory.
Mounting boot.iso on linux -
$ mount -o loop,rw /tmp/boot.iso /mnt1
$ ls -la /mnt1
total 47
dr-xr-xr-x 1 root root 2048 Jun 24 14:21 ./
drwxr-xr-x 31 root root 4096 May 30 19:14 ../
-r-xr-xr-x 1 root root 34816 Jun 24 14:21 bootcd.iso*
dr-xr-xr-x 1 root root 2048 Jun 24 14:10 isolinux/
-r-xr-xr-x 1 root root 220 Jul 11 2011 trans.tbl*
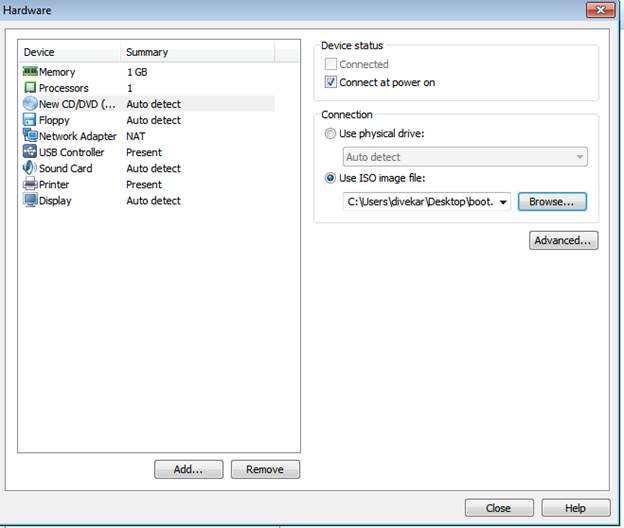
First map the cdrom drive to boot.iso file and then boot from it.
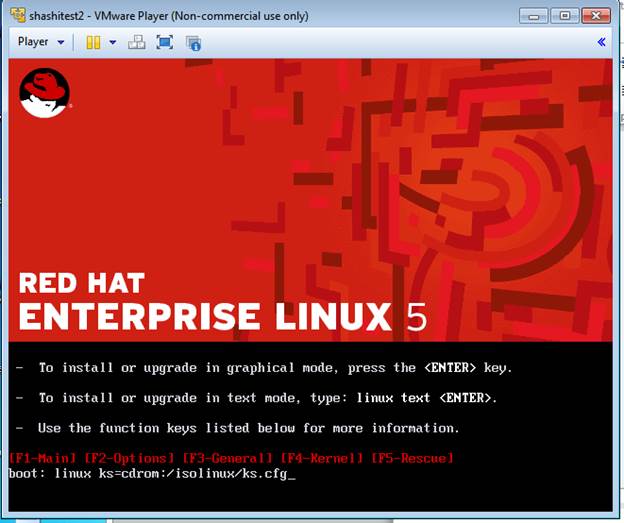
Command to boot/kickstart from the boot.iso file.
linux ks=cdrom:/isolinux/ks.cfg
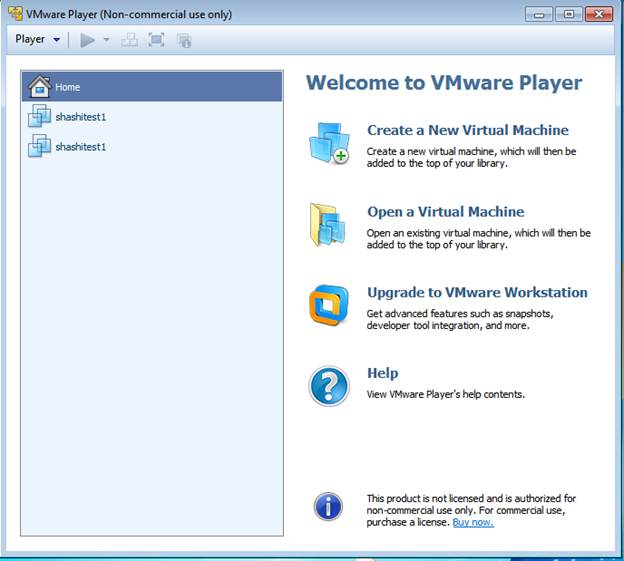
Start Vmware Player.
Select “Create a New Virtual Machine”
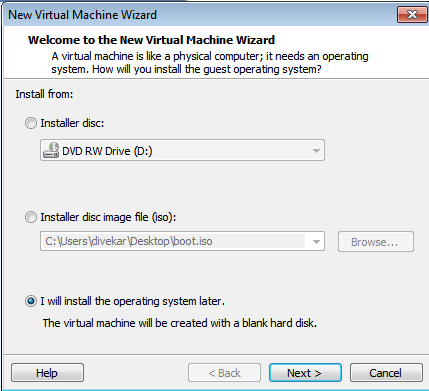

Click on “Customize Hardware” for pointing cdrom drive to the custom boot.iso file we have prepared.
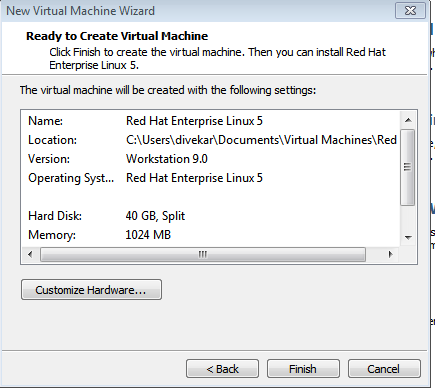
Click on “Finish”
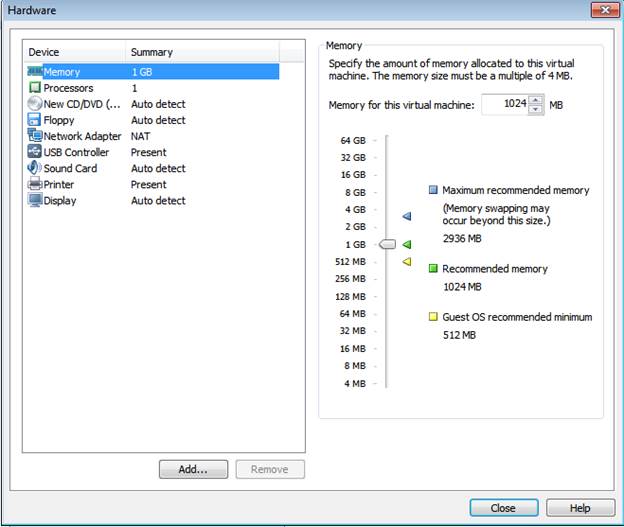
Note – Ones the VM is created, you can click on “Edit virtual machine settings” and select proper memory and number of cpu cores as per your requirement.
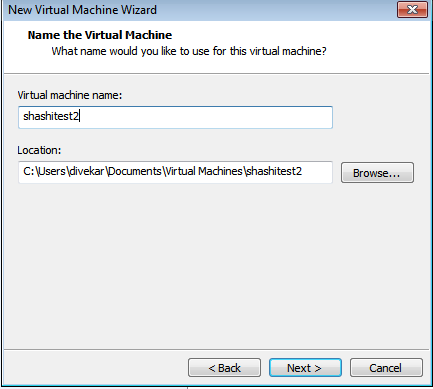
In this example the VM will be created under C:\Users\divekar\Documents\Virtual Machines\shashitest2
Power on the VM. Ones you power on the VM, it will boot from the iso cd.
At “boot:” prompt type “linux ks=cdrom:/isolinux/ks.cfg” for doing automated kickstart.
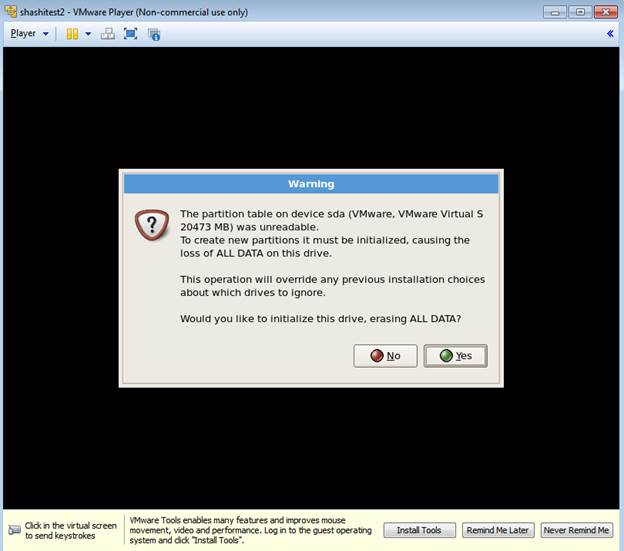
Ones the system starts kickstarting check all the displays
Control-Alt F1/F2/F3/F4/F5/F6/F7/F8
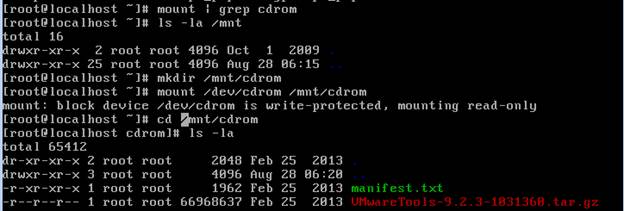
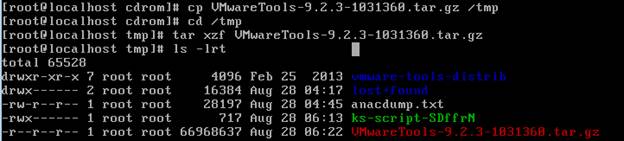
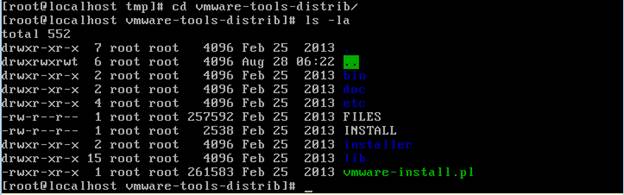
Ones the operating system has been installed on a VM, install Vmware Tools.

Start the VM and logon to Guest OS/VM from Vmware Player. Install Vmware Tools.
![]()
![]()
Now shutdown the VM and power it off.
Logon to VM.
# shutdown –h now
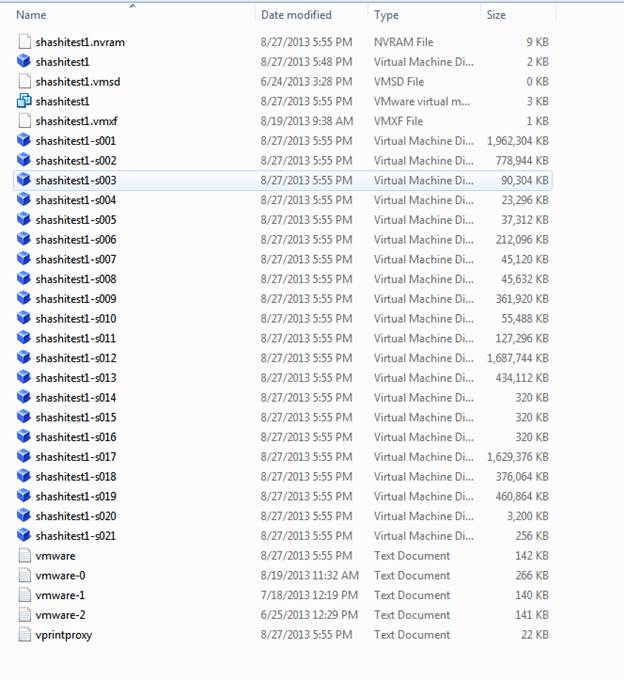
For example on Windows the VM folder location for shashitest1 is -
C:\Users\divekar\Documents\Virtual Machines\shashitest1
The VM folder shashitest1 contains following on Windows Laptop –
Migrating the VM –
Copy the VM and move to another Windows Laptop or to MAC.
Start Vmware Player on the 2nd Laptop/MAC
Click on “Open Virtual Machine”
Select the VM folder copied from another machine.
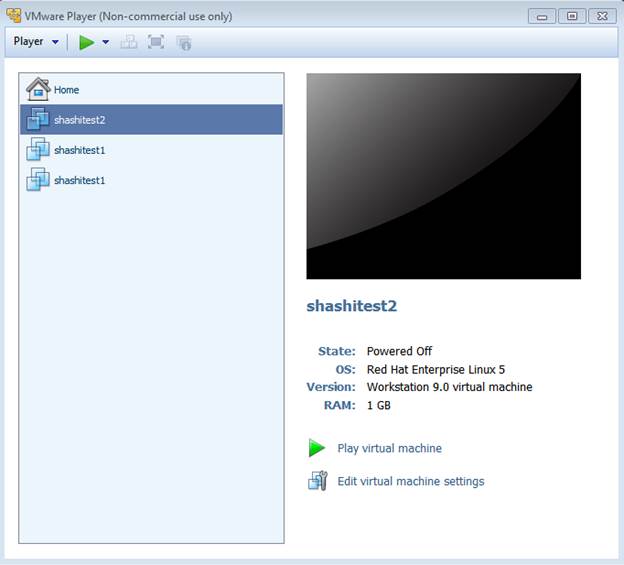
Click on “Play Virtual Machine”
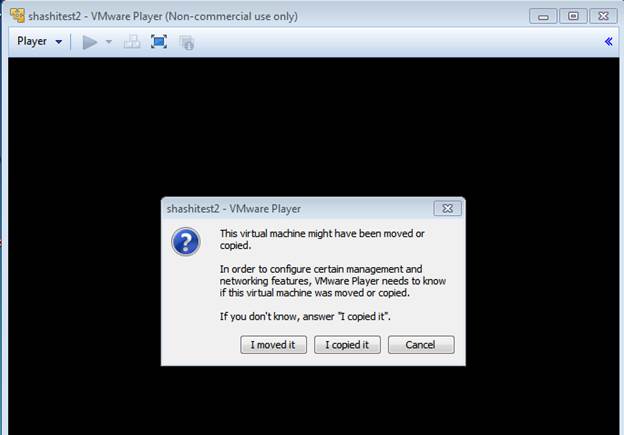
Click on “I copied it”.
Your VM will start and you can start using it.
Migrating VM from MAC to Windows Laptop -
1) On MAC, the VM image is located under /Users/Shared/VmWare. We chose that location as it’s visible to all users that login into the computer.
2) Copy the entire directory /Users/Shared/VmWare from MAC to USB and then from USB to Windows Laptop.
3) Install Vmware Workstation on Windows Laptop
4) Following settings apply for "Vmware Workstation on Windows Laptop" if you want to use bothe eth0 and eth1 of Linux VM.
eth0 will get DHCP Address and will get connected with Wireless Network.
eth1 will have a fixed IP address and will get connected to ethernet connection.
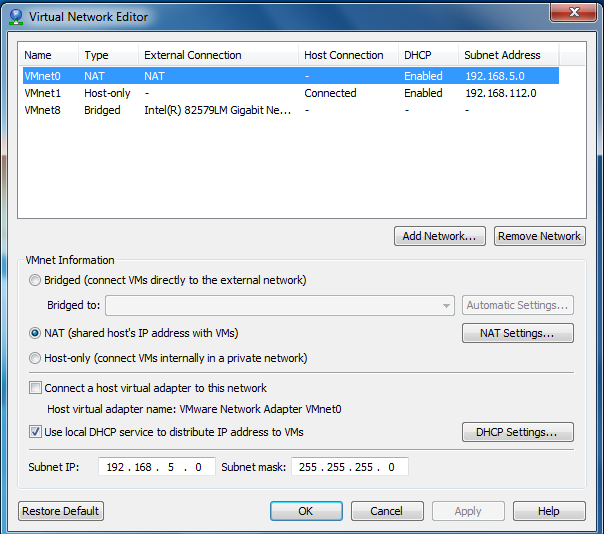
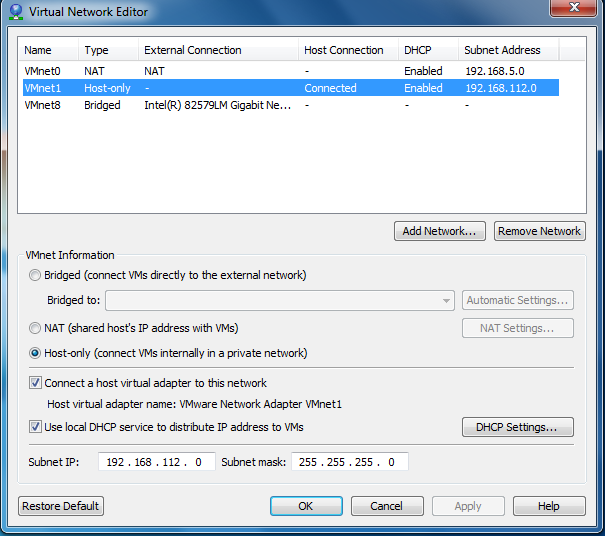
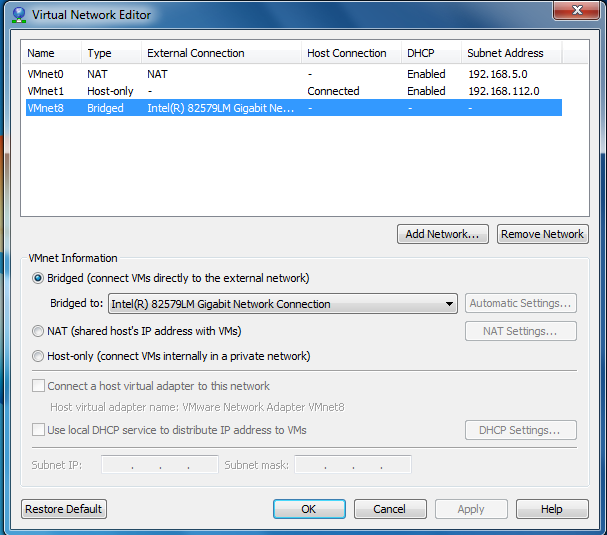
5) Star the program "Virtual Network Editor" and set up following -
Vmware Workstatation comes with “Virtual Network Editor”. Following are few of the important “Virtual Network Editor” screenshots -
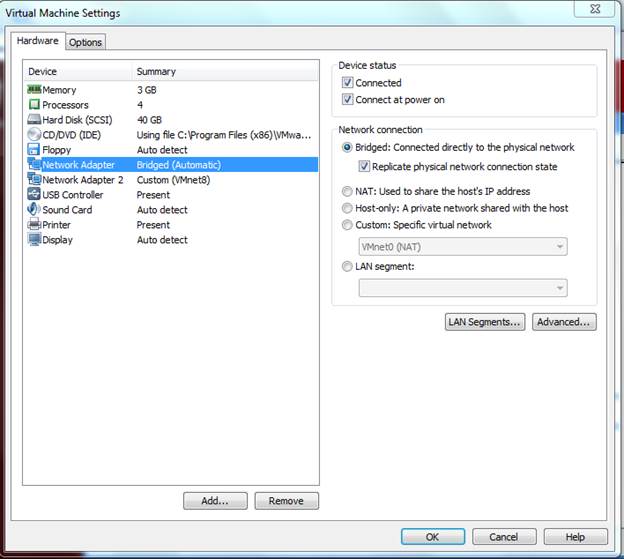
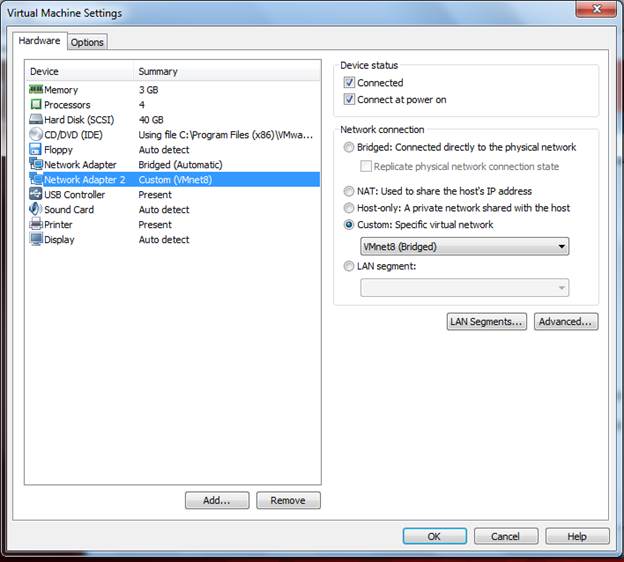
Right Click on VM name and click on “Settings”. Following screenshots are of “Virtual Machine Settings”.
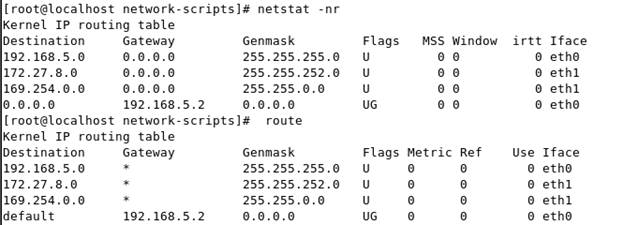
Command issued for getting internet connectivity via wireless –
route add default gw 192.168.5.2 eth0
[root@localhost network-scripts]# ping yahoo.com
PING yahoo.com (98.138.253.109) 56(84) bytes of data.
64 bytes from ir1.fp.vip.ne1.yahoo.com (98.138.253.109): icmp_seq=1 ttl=128 time=90.6 ms
64 bytes from ir1.fp.vip.ne1.yahoo.com (98.138.253.109): icmp_seq=2 ttl=128 time=144 ms
[root@localhost network-scripts]# ifconfig eth0
eth0 Link encap:Ethernet HWaddr 00:0C:29:E9:E6:E6
inet addr:192.168.5.128 Bcast:192.168.5.255 Mask:255.255.255.0
inet6 addr: fe80::20c:29ff:fee9:e6e6/64 Scope:Link
UP BROADCAST RUNNING MULTICAST MTU:1500 Metric:1
RX packets:2745 errors:0 dropped:0 overruns:0 frame:0
TX packets:1477 errors:0 dropped:0 overruns:0 carrier:0
collisions:0 txqueuelen:1000
RX bytes:508083 (496.1 KiB) TX bytes:123331 (120.4 KiB)
Interrupt:67 Base address:0x2024
[root@localhost network-scripts]# ifconfig eth1
eth1 Link encap:Ethernet HWaddr 00:0C:29:E9:E6:F0
inet addr:172.27.8.12 Bcast:172.27.11.255 Mask:255.255.252.0
inet6 addr: fe80::20c:29ff:fee9:e6f0/64 Scope:Link
UP BROADCAST RUNNING MULTICAST MTU:1500 Metric:1
RX packets:2678 errors:0 dropped:0 overruns:0 frame:0
TX packets:783 errors:0 dropped:0 overruns:0 carrier:0
collisions:0 txqueuelen:1000
RX bytes:391058 (381.8 KiB) TX bytes:36478 (35.6 KiB)
Interrupt:67 Base address:0x20a4
# cat /etc/sysconfig/network-scripts/ifcfg-eth0
# Advanced Micro Devices [AMD] 79c970 [PCnet32 LANCE]
DEVICE=eth0
BOOTPROTO=dhcp
ONBOOT=yes
HWADDR=00:0c:29:e9:e6:e6
# cat /etc/sysconfig/network-scripts/ifcfg-eth1
# Advanced Micro Devices [AMD] 79c970 [PCnet32 LANCE]
DEVICE=eth1
BOOTPROTO=none
ONBOOT=yes
#HWADDR=00:0c:29:b2:c3:f3
NETMASK=255.255.252.0
IPADDR=172.27.12.12
#IPADDR=172.27.8.12
GATEWAY=172.27.12.1
#GATEWAY=172.27.8.1
TYPE=Ethernet
USERCTL=no
IPV6INIT=no
PEERDNS=yes
Issues and Solutions -
1) In case you have an issue about VM system clock not matching the host machine time. There is a setting under the VMWare controls "settings-> Advanced" that there is a menu to sync it. This is for VmWare fusion 6.