Run Gleam w. MRvcmt (SLAC Public)
This procedure details how to use MRvcmt on SLAC Public to access a build of Glast Release software (EngineeringModel, GlastRelease, or ScienceTools) and run two applications (test_Gleam and Gleam).
Note: At present, Glast software builds are located at /nfs/farm/g/glast/u30/builds. There you will find that you can access directories containing VC8Debug (Windows) builds, as well as directories containing the debug and optimized (i.e., non-debug) Linux builds (rh9_gcc32 and rh9_gcc32opt, respectively). It is strongly recommended that, after logging in to SLAC Public, you explore these directories to familiarize yourself with their contents.
As indicated below, for the puposes of this exercise, we are interested in the debug version of the Linux GlastRelease builds:
chuckp@noric08 $ cd /nfs/farm/g/glast/u30/builds
chuckp@noric08 $ ls
VC8Debug rh9_gcc32 rh9_gcc32opt
chuckp@noric08 $ cd rh9_gcc32
chuckp@noric08 $ ls
EngineeringModel GlastRelease ScienceTools
chuckp@noric08 $ cd GlastRelease
chuckp@noric08 $ ls
And more specifically, we are interested in GlastRelease-v6r6p1.
Prerequisites
- Determine the checkout package and which version of that package
you are interested in. (Refer as necessary to the Release Manager.)
Note: On Windows machines only GlastRelease v6r6p1, and later, support automatic launch of FRED as the event viewer.
Part I. Set up Your Work Directory and CMT Options
Work Directory
- Login to SLAC Public. (Be sure you are logging in to noric.)
Note: If you are running on a Windows machine, be sure to launch your X-server (e.g., X-Win32 v 6.0, or higher); it must be running in the background.
- Change to your work directory, e.g.,
cd /nfs/farm/g/glast/u33/yourDirectory
CMT Options
- Launch MRvcmt from your work directory by entering (at the command line):
MRvcmt
- From the MRvcmt menubar, select:
Options --> CmtOptions
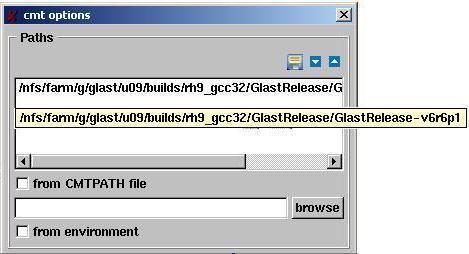
The "cmt options" dialog window will pop up. You will need to define two types of paths:
The first type is to the directory where the build you are interested in is located.
For example:
- Double-click in the Paths field and enter the Cmt Options
path so that it points to the build of Glast software you
are interested in.Tip: If you need to erase, cursor to the left of the
character(s) you want to erase and use the Backspace
key.The second type of path is to the directory containing the cmt.exe.
- Enter the root: /afs/slac.stanford.edu/g/glast/applications/
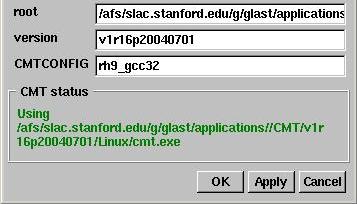
- Enter the version, e.g., v1r16p2004070.
Note: Make sure the CMT version is correct for the
release version you are working with. (See http://glast-ground.slac.stanford.edu/index.cfm?do=extLib.welcome.)
- Enter the CMTCONFIG.
- Click Apply, then click OK.
Note: In this example, since we are running on SLAC Public (which has only Linux machines), and we have selected the debug version, we would enter rh9_gcc32.
Observe that all of the packages in the build for GlastRelease-v6r6p1 are now displayed in the Packages Tree.

Part II. Run the test_Gleam Application
- In the Packages Tree, scroll down and select Gleam.
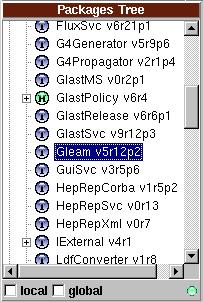
Note: Observe that the light is green.
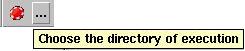
- Click on the ...button immediately to the right of the red Run application button.
The following GUI will appear:

- In the data entry field, enter the path to your work directory (or to a directory where you have write access), e.g., /nfs/farm/g/glast/u33/yourDirectory.
Then click on the Accept button.
- Select test_Gleam from the "List of Constituents" drop-down menu.
- Click on the
 Run application button.
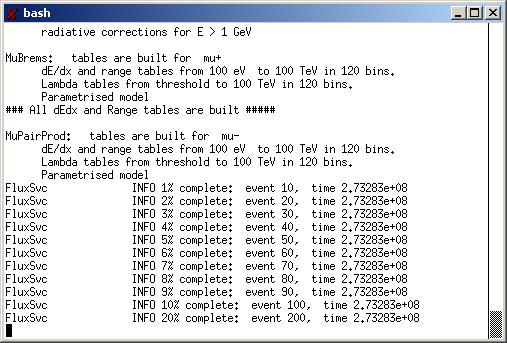
You can follow the progress of the test_Gleam application in the bash window, and you should see progress information similar to:
When test_Gleam has completed, you should see something similar to the following under the output tab, and the merit.root file should be in yourDirectory.
*****
ChronoStatSvc.f... INFO Service finalized succesfully
RootTupleSvc INFO Writing the TTree "MeritTuple" in file /nfs/farm/g/glast/u33/chuckp/mrvcmtWorking/merit.root with 207 rows (1000 total events)
RootTupleSvc INFO Writing the TTree "pointing_history" in file /nfs/farm/g/glast/u33/chuckp/mrvcmtWorking/merit.root with 13 rows (1000 total events)
ParticlePropert... INFO Service finalised successfully
ApplicationMgr INFO Application Manager Finalized successfully
Current time: Wed Apr 13 09:31:35 2005 ( 182 s elapsed)Tip: If you right click in the space under the output tab in the MRvcmt GUI, you can clear the display area, by clicking on clear all.
Note: You can also select highlight errors in this GUI.
Part III. Run Gleam
- Make sure that Gleam is still selected in the Packages Tree.
- From the list of constituent packages, select the Gleam application:
- Click on the Run application button.
You can follow the progress of the Gleam application in the bash window. When the first events are available, you will see a message similar to the following, and FRED should launch automatically.
| CORBA set up the ior file to /tmp/hepeventserver.ior CORBA HepRep Object Ready ./kernel/modules/Help/module.rb:38: warning: Insecure world writable dir /afs/slac.stanford.edu /g/glast/applications, mode 040777 Wow, I've been requested by Fred, v1.0 Replied with GlastServer version=0.1;dataFormat=heprep2;setEventCommand=next,commands,getEventId,fluxes,source,back, eventId,eventIdx I've just given to Fred, v1.0 an HepRep object |
- Click on the
 Next Event button to view the first event.

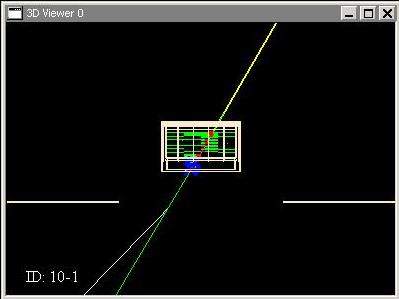
- Click on the Next Event button again to view the next event:
Notes:
- Observe that the ID number in the lower left increments by one each time you click on the Next Event button.
- Refer to the FRED Tutorial to explore additional functions of the viewer.
- Continue to view events. When you are finished:
- Click on the FRED
Stop button.
- To quit FRED, select:
Main --> Quit
Tip: Or use the shortcut: Ctrl-Q
To quit MRvcmt, click on the red
Create and Run Your Own jobOptions.txt File
(for Advanced users)
To create a new Gleam jobOptions.txt file:
- First copy the jobOptions.txt file from the builds directory to your working directory:
cp /nfs/farm/g/glast/u30/builds/rh9_gcc32/GlastRelease/GlastRelease-v6r6p1/Gleam/v5r12p2/ src/jobOptions.txt .
Note: The above is all one line.
- Refer to Gleam JobOptions Files and edit your copy of the jobOptions.txt file.
- Save the file in your work directory and name it gleam_jobOptions.txt.
- In the "Optional parameters for the executable " field, enter the full path to the
new gleam_ jobOptions.txt file; for example:
/nfs/farm/g/glast/u33/yourDirectory/gleam_jobOptions.txt
- Run Gleam as described above.
| Last updated by: Chuck Patterson 06/29/2007 |